Friday, January 31, 2014

Baby booties and patching

Hi,my first pair of booties-slippers for my 4 y old son was made after eye -he needed a pair for his snowflake dance in the kindergarden-but i felt in love with these ones i found on Ravelry for free and made two pairs just for fun.They are so cute!Thank you Salena Baca!
Here you can find the pattern:Ravelry.com/Stores/Baca-Creations 
I used wool- acrylic yarn and hook size 4.5 .


Last two images featuring my husbands sock that was damaged and patched with a few rows of single crochet.My grandmother used to patch the socks using a ladle and needle but i found out that if i don't want to throw the socks right away at their first hole crochet is solving problem very well ;)


Linking this post to Annemarie's Haakblog-linky party !Thank you for hosting and thanks for visiting!
ildi

Saturday, January 25, 2014

Infinity scarf

Hello,
this weeks crochet fruit was this infinity scarf made for my eldest son.A simple striped pattern that is so effective.The first time i used 100%wool and i love the quality of the yarn.The 100 gr skein costed me about 7 usd  the only thing is that it comes only in a few colors and it is thin so i ended up to chain 185 for the begining.Every row took me from 14-to 20 minutes.Well, 14 minutes was my record as i counted every row to spice up the "journey".It was a good opportunity to improve my skills and try avoid the bubbling effect that happens when the double crochet is not made in exactly same manner.If you go loose a part the weavy effect will show up at overall look.Must i say that when i was hookin' my 14 minute row my fingers went cold on my left hand ;)Thought a simple pattern still it was a very good excercise.
Both ends were dubbled by a row of slip stich and as i didn't dare to work in round(that would have been much easier) i just sewed the ends and left some yarn "moustaches".
Here is the result:
Linking up my stuff to Annemarie'S Haakblog.Pop over at her site ,you'll find amazing crochet achievements.
Thank you for hosting!Thank you for the visit!
 

Sunday, January 19, 2014

Granny stitch beanies

While ago i made a beanie using the granny stitch(not knowing its name then)following no patterns and i liked the result.Yesterday i made two beanies of same kind with slight modifications on each one regarding the increasing rounds and writted down the pattern.I will take the time to write it down if anyone interested but first i make another trial.It is not difficult at all and it goes quite fast.You can see a picture with the basics of the hat.I guess it speaks for itself.The next rounds are the increasing rounds-i opted for 2 granny groups of 3 dc increases each of the following 4 rounds. When reached 20 grannie groups of 3dc's , ended up with 5 rows with no increase.This is an adult woman size beanie while the pink one has only 19 granny groups so it is a bit smaller.See how it looks like on my little one 4.5 year old boy model(lol).Also started to work some puff flowers- after i learned the stitch from my mother who was an avid knitter and crocheter but not anymore as she lost interest and doesn't saws very well.
Hats were made with 4ply yarn (i guess-i never know for sure as it is not mentioned) and hook nr 4.5.


This will be a headband with the puff flower.I used my tunisian crochet hook(actually i have a whole set of tunisian hooks bought for 8 usd-from nr.3 up to nr10)made of bambus and  felt a bit unconfortable due to my dry hands but i can crochet much faster with it than with a regular plastic or aluminium one.So i'm very pleased with the accuisition.
 

This beanie is still a wip but not for too long ;)
Linking this post to Annemarie's Haakblog.Hop over to see fabulous crochet projects !Thank you for hosting!Thank you for visiting!
All bests.............ildi

Wednesday, January 15, 2014

Criss cross puff beanies

Hello,
about 4 months ago when i started to crochet via my android phone i came across Yolanda's channel on YouTube and i was very happy to find a lot of great projects I was interested about.This criss cross puff stitch was my first or second stitch i've learned and used to work into my beanies "body".
If you're interested in learning this lovely stitch just click the link above that will take you to Yolanda's channel:
http://www.youtube.com/watch?v=77hlQBED-p8&list=UU2vNl4iUpM4Z1Lxlg2BN_4Q&index=121&feature=plcp
She made a beautiful beanie using this stitch(I guess her own variation of the puff stitch.)
I've made three of it (lol) but first two were not at the hight of my expectations.I'm a perfectionist .Maybe i pulled the yarn to tightly during the "session"and the result was a narrow beanie good for a 1-3 years old child.I made another trial but (see the grey one) still wasn't as it supposed to be so for the third one( had no phone to rewatch it)i made a hat pattern using this stitch and i just looove the result!It is a commissioned work for the biggest girl of my brothers.The only thing is -rewiewing this pattern on my hat-as i didn't remembered to skip one stitch and work a puff in the next etc the lines when stretching the hat is not so beautiful like Yolanda's.It was a need to increase the size with adding new puffs at the end of rows(while Yolanda's is going the same nr.of puffs each row) and (as it was a requirement)i added a pink rosette with a pink button to accomplish the task.:).Anyway i know how to increase with puffs now and i next time i will remeber the skip one work one trick. I'm waiting some pictures with the beanies made for all my brothers feminine family members and sending tomorrow the new beanie to Hannah.


Happy hookin'.......................ildi

Sunday, January 12, 2014

Color mittens

Hello,
being the third pair of mittens made before Christmas i was inpired by these lovely ones:  http://crochetincolor.blogspot.ro/2011/10/colorful-stripey-fingerless-mitts.html
 i didn't followed the pattern just made them after my hand still i'm pretty sure they would have been much prettier if i would not be so stubborned.For ex.i like mittens to begin from arm to fingers and not inverse.It is a good project to learn how to combin colors smoothly and use all leftover yarns.This was a gift and i was happy that she liked it Made with hook nr.5and finished off with the cancer stich.I love that stich.And i know hook sizes and yarn tickness does count a lot so i will pay more attention next time.My pair is not so perfect but they are... moody.

Thanks Liz !Your mittens are awesome!
Bests..........................................ildi

Saturday, January 11, 2014

mice party

Hi!
i've found this sweet little crochet mouse tutorial over at thegreendragonfly completely free!!!Thank you Janette from New Zeland!just click the bold word that will take you right away at her lovely tutorial!

When I was working the first mousy didn't paid right attention to the popcorn stich used at its arms and legs and pulled my bambus hook to hard ... sadly lost the hooks head...:( so for the second mice i only got the metal size 1 hook and changed the 4 ply yarn to the 2 ply one i guess)it seems that for the size1 hook the yarn was still too thick and the little brother mice's head doesn't wanted to take right shape . I was pushed to make my own version.I tried to make a one piece head and done it somehow but the ears are not too cute and round.And of course made it "by eye" as we say here no writting down the rows beeing just a trial.Anyway the mice looks good and it has a fiesta tiny bowtie and the kids love them.Thanks again Janette!

I may still add a little mouth to both of them :) 

Blogpost linked at Annemarie's Haakblog!Thank you for hosting the party!

Happy hooking!..........................ildi

Pentru tutorialul soricelului colorat, dati click pe cuvantul thegreendragonfly din primul enunt al acestei postari.

Friday, January 10, 2014

crocheted hearts and star

Hello,
this is the thred i was looking for a week or so ago...nothing left.A simple packaging cotton thred ball had a luckier destination than usual.The result is lovely.I've found so so many crochet heart tutorials on the net even spent some hours to make mine too :) -well some variations on the basic model and some other approaches.
But than i stoped at Susies Stuff  and made some right away!Many thanks Suzetta!
My contribution regarding this little cuties was to add mini colorful pom-poms for busting their charm.Not as if they don't had already :)
It is so good to have such cute minnies at hand for any occassion! And they look gorgeous on the christmas tree!

  Here is the link to the heart tutorial  at Susies Stuff
  http://suzies-yarnie-stuff.blogspot.ro/2007/04/suzettas-heart-pin.html

All best yarns for you!..............ildi

Thursday, January 9, 2014

sisal punishment

Have you heard about sisal hemp?
It's the best material for ropes and carpets,decorations,rugs.It's origins seams to be Yucatan or Chiapas.
It is an ecologic thred,very storng,antistatic,nontoxic,biodegradable.

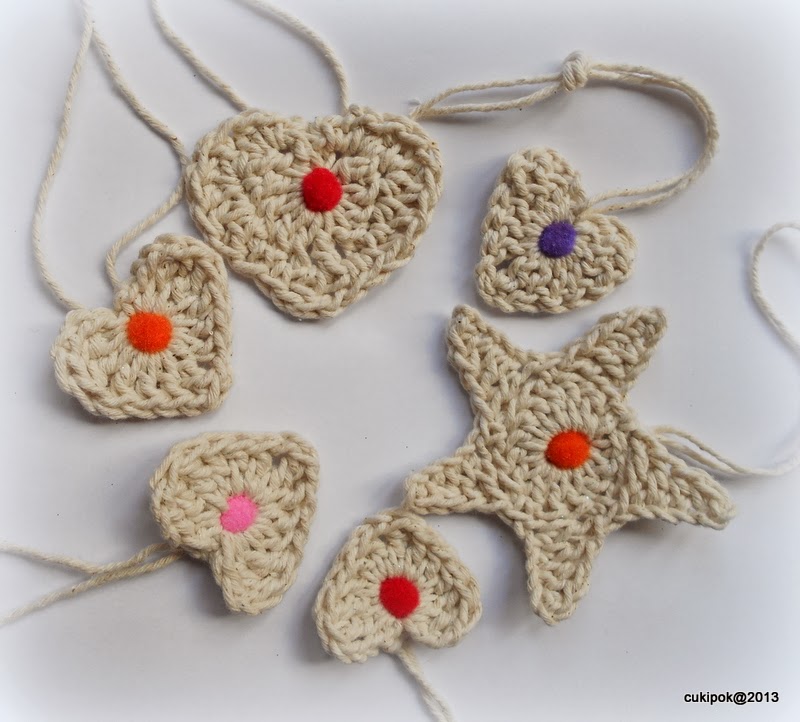
A few days ago was supply run day.Needed some threads found some,carpenter needles,ribbon etc.I bought some sisal thread form the gardening department to make the day round.My intention actually was to buy smooth twisted 100% natural cotton thread for packaging as i run out of it right before Christmas.(of course after i made quite a lot heart and star ornaments-i will post about it later)
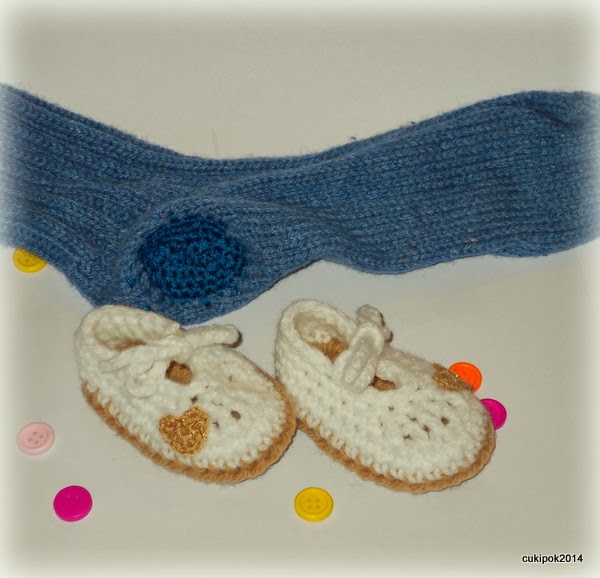
But i only could find this sisal that kept my attention. I felt in love with its color and raw beauty.Thought it was a punishment to my fingers working with it i'm still loving it.Because i love the result...even if i felt somehow like H.Andersen's Elisa who had to knit 12 nettle pullovers for her enchanted swan brothers,i'm still giving it a chance...Have no pattern for the cups yet as i just gave it a go that night and i felt later sorry about not writting every row of it.Next day had no luck with the remake because i worked in round ...will  still work on the pattern(meantime i have made a lot of bowties for my sons and husband and tried a little mouse pattern i will post later hopefully).


l
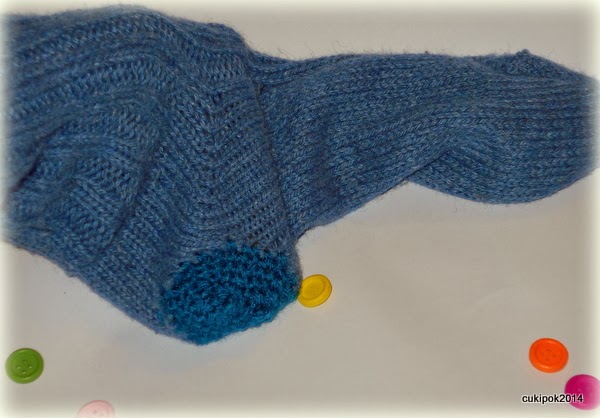
lovely texture on its back
This is an original Easter project i hope to finalize soon and make it available on my Etsy.


MIc proiect de Pasti.Cosulet pentru oua vopsite si suport pt oua.
Cosulet realizat cu piciorus mic din fir de sisal.

Stay warm .............ildi

Saturday, January 4, 2014

Thank you crocheters!

this post wants to be a big Thank You for all who shares their crocheting adventures with so much care and love.i learned a lot from you Allfreecrochet,!!!!tjw1963-youtube,crochetgeek-youtube,Yolanda Soto Lopez youtube  and the list is growing day by day!
.
i'm so glad i found a vivid colorful crochet world,studious hands,loving hearts!God bless you!
                          Happy New Year for all my friend and kind visitors!!!
                                    LA Multi Ani!! Boldog Uj Evet!!
as a celebrations for this new year i'm sharing with you my first infinity scarf pattern in two variations.possibilities are many working with the basic well knowed "leggs"combination(as we are calling sc and dc around here). this simple pattern is from my head but i'm pretty sure others has come up with something similar as the amount of patterns gathered yar by year on the crocheters sites must be huge.
i'm not sure how well can i keep my endeavours up to date with this blog as i prefer to sit and work than to write.i do amit thought that it is very necearry too keep organized and stay in touch with you.
hopefully you'll like the pattern,so here it is:

           abbreviations:
sc-single crochet
dc-double crochet
hdc-half double crochet
BL-back loop of the chain
FP-front post  (the legg beneath the chain)
R-row 
rep-repetition
ch-chain 
         the pattern showed on the scarf (hook size 9mm,bulk yarn,skill level:easy:)
                 ch 140
                 R1:sc all around ch2 turn
                 R2:FP dc all around ch2 turn
                 R3:BL dc aorund ch2
                 R4-10:rep R2 and R3
                 last row sc all around  
      variation I.
                 ch140
                 R1:sc all around ch2 turn
                 R2:FP hdc ............ ch2 turn
                 R3:BLdc ................ch2 turn
                  R4-10:rep R2 and R3
                 last row sc all around  
     variation II.
                ch 140
                R1:sc all around ch2 turn
                R2:FP hdc.........ch2 turn
                R3:BL sc...........ch2 turn 
                R4-10:rep R2 and R3
                 last row sc all around 
         
here is a little example-first 8 rows from left to right showing the scarfs pattern(the yarn is thin) 
                                   row 9-13 is showing variation I 
                                   row 14-19 showing variation II
and how the backside of the pattern looks
this pattern look much better with the thick yarn.


                 happy cro!.......ildi
Ps what i still have to do (among lot of others)is to dusk my fav blog list with a tone of awesome crochet and knitt sites!